這一篇我打算用雙語來寫(原諒我的英文程度一般), 因為上網搜了一下, 發覺藍精靈鉤織娃娃的圖樣不多, 而且現在藍精靈電影快上影了, 或許有興趣的人蠻多吧, 加上我的這個版本很簡單, 不需要眼睛嘴巴的, 我個人也蠻喜歡的(只是帽子的造型有點不太一樣原版而已^^), 所以就想分享一下.
I planned to write this blog post in both Chinese and English (and sorry for my poor English if noticed), because after searching the web, I found that the crochet pattern available for Smurf is not that much, furthermore
The Smurfs movie is around the corner, maybe there will be quite some numbers of those who are interested, and, my version is quite simple, without the complicated eyes and mouth, which I love it (it just the design for the hat is a little bit different from the original look ^^), so just decided to share it here.
一開始就像以往一樣, 請參考
兔斯基, 因為這會是身體, 頭部, 手和腳的鉤織圖樣. 避免冒犯原版, 所以不在這裡刊出, 請去這個網頁下載.
First of all, as usual, please refer to
Tuzki Rabbit, which will have the crochet pattern for the body, hat, arm and leg. In order not to offend the original design, I will not post it here, so please download the PDF from this website.
身體的鉤織圖樣是從底部開始, 所以要製作藍精靈, 就必須要從白色毛線鉤織褲子部分.
根據兔斯基圖樣鉤織第一至第五行, 然後換成藍色毛線, 繼續其它步驟完成至頭部.
雙手用藍色毛線根據兔斯基圖樣鉤織, 而雙腳則用白色毛線.
The crochet pattern of the body starts from the bottom, so in order to make Smurf, you need to start by using white yarn for the pants part.
Crochet according to the Tuzki Rabbit pattern for Round1 to Round5, then change to blue yarn, continue to finish until the head.
Both arms will be using blue yarn following the same Tuzki Rabbit pattern, while white yarn for both the legs.
或許大家沒有注意到, 藍精靈也有小尾巴哦, 製作圖樣就根據兔斯基圖樣裡面的尾巴部份, 使用藍色毛線完成.
Some might not notice that Smurfs do have a little tail, just follow the tail part in the Tuzki Rabbit pattern, completed by using the blue yarn.
基本構造完成後, 同樣根據兔斯基圖樣裡面的教學, 把小尾巴, 手手腳腳縫上身體.
After the basic parts are completed, follow the steps in Tuzki Rabbit pattern for how to sew the little tail and both the arms and legs to the body.
好了, 現在人型出來了, 就要動手弄耳朵和鼻子了.
耳朵的鉤織圖樣如下(需要做兩只):
* 請注意耳朵部分不是圓狀鉤織
Ok, now the figure of the Smurf is done, so it's time to start making the ears and nose.
The pattern notes for the ears as follow (make two):
* Please aware that the ears are not working in round
Row1: With blue yarn, ch 2, then 6 sc in the second chain from hook (6)
Row2: Turn work, ch 1, then 6 sc in each st. (6)
Ending: Slip st with the last st, leave long end for sewing, fasten off.
接下來是鼻子的鉤織圖樣如下(圓狀鉤織):
The following will be the crochet pattern for the nose (work in round):
Round1: With blue yarn, ch 2, then 6 sc in the second chain from hook (6)
Round2: Work in round. (Sc in the next 2 sts, 2 sc in next st) 2 times (8)
Round3: (Sc in next 3 sts, 2 sc in next st) 2 times (10)
Round4&5: Sc in each st around. (10)
Ending: Slip st with the first st, leave long end for sewing, fasten off. Stuff nose.
以手腳縫合的方法, 把橋好位置的耳朵和鼻子縫上.
Using the same method as to sew the arms and legs, sew the ears and nose to its positions.
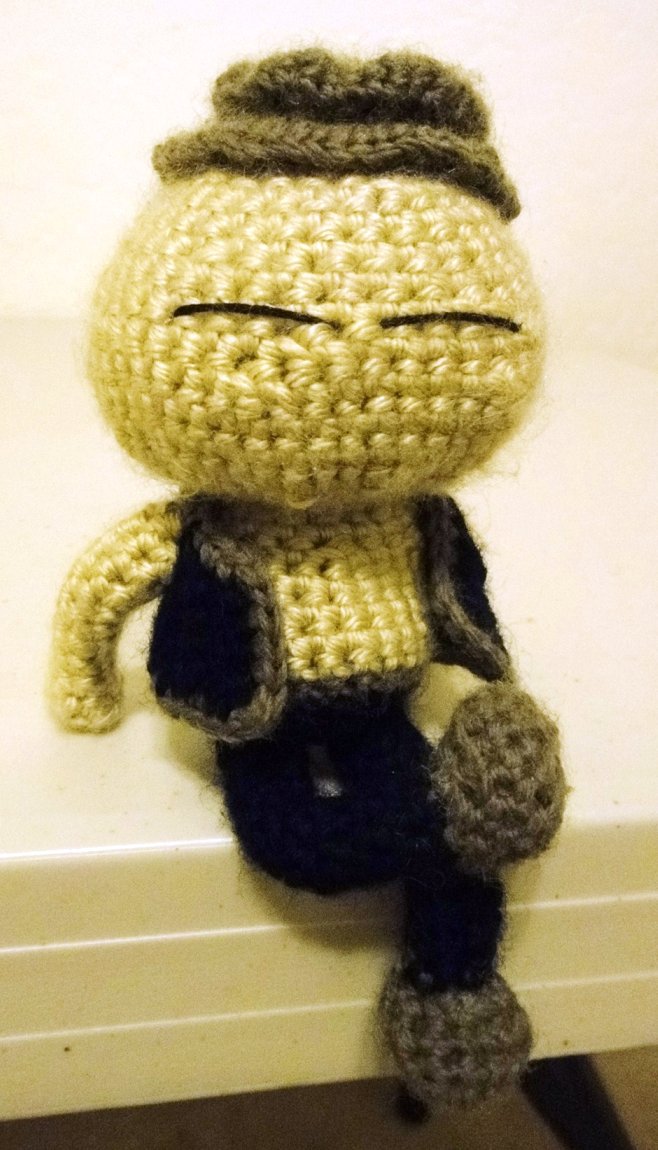
以黑色絨線繡上彎月形的眼睛, 位置和大小可以隨個人喜歡, 這樣小懶蟲藍精靈就出來啦~
With black embroidery floss, embroider the crescent-shaped eyes, the location and size can be adjusted according to personal preference, so now, the Lazy Smurf is now appeared!
等等, 當然還有那頂不可缺少的帽子啦...
我自己對這頂帽子不是太滿意, 因為形狀不太像原版的, 可是製作小懶蟲的我也是懶豬一名, 所以已經弄出這個模樣就不想拆掉從來了.
帽子的鉤織圖樣如下(圓狀鉤織): * 歡迎各位更改至完美版, 不介意的也可以分享給我~
Wait, of course we can't miss out the must-have hat...
I'm not quite satisfied with this hat, as the shape is not quite close to the original look, but since me who is making the Lazy Smurf is also a lazy pig, so just reluctant to tear of and start over again.
The crochet pattern for the hat as below (work in round): * Welcome to modify it to become a perfect version, if you don't mind, please share it with me too~
Round1: With white yarn, ch 45, join slip st with first st and be cautious not to have the work twisted.
Round2&3: Sc in each st around (44)
Round4: (Sc in next 2 sts, sc next 2 sts together) 11 times (33)
Round5&6: Sc in each st around (33)
Round7: Sc in next 11 sts, (sc in next 2 sts, sc next 2 sts together) 3 times, sc in next 10 sts (30)
Round8: Sc in next 9 sts, (sc in next 2 sts, sc next 2 sts together) 3 times, sc in next 9 sts (27)
Round9: Sc in next 6 sts, (sc in next 2 sts, sc next 2 sts together) 5 times, sc in next 6 sts (22)
Round10: Sc in next st, (sc in next 2 sts, sc next 2 sts together) 5 times, sc in next st (17)
Round11: Sc in each st around (17)
Round12: Sc in next 7 sts, (sc next 2 sts together) 2 times, sc in next 6 sts (15)
Round13: Sc in next 6 sts, (sc next 2 sts together) 2 times, sc in next 5 sts (13)
Round14: Sc in next st, (sc next 2 sts together) 6 times (7)
Ending: Slip st with the first st, fasten off. Hide the tail.
把帽子戴上, 擺個姿勢, 小懶蟲藍精靈完成~
Put on the hat, make a pose, and now the Lazy Smurf is complete!
Pin It Now!